Why Backyard Soil Testing Matters
Backyard soil testing basics give homeowners a clear view of what is happening below their lawns and garden beds. By measuring garden soil pH, you see whether the soil is acidic or alkaline, which affects how well plants use the nutrients already present. Testing also shows if the soil provides enough key nutrients such as nitrogen, phosphorus, and potassium, or if important elements are lacking. Instead of guessing and adding fertilizer at random, you can use soil nutrient testing results to choose amendments that match the plants you want to grow.
Understanding your soil helps protect your yard over the long term. When you know basic soil testing principles, you can avoid over‑fertilizing, which may stress plants and wash unused nutrients away during heavy rain. Regular checks of pH and major nutrient levels let you adjust care as conditions change, such as after adding compost or starting a new garden area. This measured approach supports healthier roots, steadier growth, and more reliable results from season to season without dramatic interventions or quick fixes.
Collecting a Reliable Soil Sample
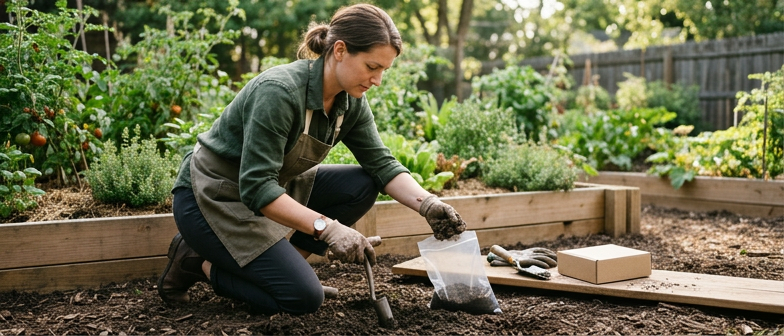
Careful soil sample collection is central to backyard soil testing basics because the way you gather soil strongly influences your test results. Decide which area you want to understand, such as a vegetable bed, lawn, or future border, and treat each as a separate sampling zone. Avoid unusual spots like compost piles, recently fertilized patches, pet routes, or places with ash, debris, or strong chemicals, because they do not represent typical garden soil. Sample when soil is not waterlogged or frozen, often in spring or fall, and use clean tools and a clean container so you do not introduce extra nutrients or contaminants. This helps ensure that information about pH, nutrients, and other properties matches the soil your plants actually use.
To take the sample, remove mulch or plant residue, then collect thin slices or cores from the top few inches of soil at several spots in the chosen area. Many gardeners combine pieces from around ten locations into one mixed sample. Place the soil in a clean plastic bucket, break up clumps, and remove stones, roots, and debris without washing or adding water. Blend the soil thoroughly so the final sample is uniform, then air dry it if required by your lab or home soil test kit. A well mixed sample produces more reliable readings for garden soil pH and nutrient levels and gives a solid basis for a simple garden soil data log where you can track texture, test results, and management changes over time.
| Sampling Issue | Risk to Test Reliability | Better Practice | Suggested Checklist Note |
|---|---|---|---|
| Including unusual spots | Distorted pH and nutrient picture | Exclude compost piles and treated patches | Confirm only typical garden soil is sampled |
| Sampling when soil is saturated or frozen | Unstable results and handling difficulties | Collect in moderate spring or fall conditions | Check soil is workable before sampling |
| Using dirty or reactive tools | Introduced nutrients or contaminants | Use clean, non‑corroded tools and containers | Inspect equipment before each sampling round |
| Taking soil from a single location | Overemphasis on one micro‑spot | Combine several cores into one mixed sample | Aim for multiple subsamples per zone |
| Poor mixing and preparation | Patchy readings for pH and nutrients | Break clumps, remove debris, blend thoroughly | Verify sample looks uniform before testing |
Handling and Labeling Soil Samples
After soil sample collection from different parts of the yard, spread each sample in a thin layer on clean paper and let it air‑dry indoors away from heat and direct sun. Break up clumps with a clean tool so the soil dries evenly, and remove stones, mulch, and obvious plant debris. Once dry, place each sample in a clean, sealable bag or container to keep it stable until testing.
To avoid mix‑ups between areas, label every bag or container clearly with the location and date. Use waterproof ink or a durable tag that stays readable if the container gets damp. At the same time, keep a simple garden soil data log noting where each sample came from, how deep you collected it, and any recent fertilizer or soil amendment use so test results match the right spot.
Understanding Garden Soil pH and Nutrients
In backyard soil testing basics, garden soil pH is often the first number you see. pH shows how acidic or alkaline the soil is on a scale from 0 to 14, with 7 neutral. Most garden plants prefer slightly acidic to neutral soil, roughly 6.0 to 7.0. Readings below this range mean more acidic soil, which can limit how easily plants take up nutrients. Higher readings mean more alkaline soil, which also changes nutrient availability and can lead to deficiencies.
Soil nutrient testing from a home soil test kit or a lab usually highlights elements plants need most. Nitrogen, phosphorus, and potassium are listed as N, P, and K, and results may be shown as low, medium, or high, or as numbers. Some reports add calcium, magnesium, and organic matter. Low levels suggest plants may need fertilizer or compost, while very high values mean you should hold off on extra nutrients. These results provide general guidance for garden soil rather than strict rules for every plant.
To interpret changes over time, many gardeners keep a garden soil data log for repeated pH and nutrient tests. A simple record includes the test date, where soil sample collection was done, the type of kit or lab used, and the key pH and nutrient values. Comparing entries across seasons shows how amendments and planting choices affect test results and helps you fine‑tune fertilizer and lime applications for steady, healthy growth.
Using Home Soil Test Kits and Lab Services
Home soil test kits are a fast, low cost tool in backyard soil testing basics. They usually focus on soil nutrient testing for nitrogen, phosphorus, and potassium, and may include simple checks for garden soil pH. Results appear as colors or broad ratings instead of exact numbers but still guide decisions about fertilizer, lime, or organic matter. For reliable information, follow kit directions, use a well mixed soil sample, and note results in a garden soil data log.
University or state labs provide more detailed soil testing than home kits, with measured nutrient levels, pH, and recommendations for typical garden soil. Their reports help pinpoint low fertility, nutrient imbalance, or other soil issues and support longer term planning. Many homeowners use lab services for baseline data and home kits for quick checks between lab tests or after soil changes, choosing based on needed precision, testing frequency, and budget.
Identifying Soil Texture and Physical Qualities
In backyard soil testing basics, identifying soil texture is a straightforward way to see how garden soil will behave. Texture is the mix of sand, silt, and clay, and you can estimate it at home with feel tests. Use a moist soil sample from your planting area and rub a small amount between your fingers. Gritty soil usually means more sand, silky smooth soil points to higher silt, and sticky soil that forms a tight ball or ribbon suggests more clay. Press the soil into a ball in your palm and roll it into a short ribbon; sandy soil crumbles quickly, while clay‑rich soil holds together before breaking. Notice color, how easily clods break apart, and whether the soil becomes dusty when dry to refine your soil texture identification without special tools.
These physical qualities affect drainage, root growth, and how amendments work in the soil. Coarse, sandy soil drains and warms quickly but may lose water and nutrients, while clay‑heavy soil holds them yet can compact and restrict roots and air. Loamy soil, a balanced blend of particles, usually offers moderate drainage, good structure, and stable support for roots. When you interpret results from a home soil test kit or other soil nutrient testing, texture explains why nutrients might wash out or build up. Recording texture, moisture behavior after rain or irrigation, and changes after adding compost or other amendments in a garden soil data log makes backyard soil testing more useful and helps guide steady improvements to planting areas.
Q&A
-
Why do backyard soil testing basics matter before I plant a garden?
Testing shows garden soil pH and nutrient levels so you can match plants and amendments to real conditions instead of guessing with fertilizers. -
How should I collect a soil sample so the results are reliable?
Take small cores from several spots in one area, avoid recently fertilized or unusual zones, mix them in a clean container, and keep tools free of contaminants. -
What garden soil pH range is usually suitable for common plants?
Most flowers and vegetables grow well when soil pH is slightly acidic to neutral, roughly between 6.0 and 7.0, though a few species prefer outside that range. -
What can a home soil test kit tell me about nutrients?
Most kits estimate nitrogen, phosphorus, and potassium levels and may include a simple pH check, giving general guidance for fertilizer or lime choices. -
How can I identify soil texture and keep a useful garden soil data log?
Use the feel test to judge sand, silt, and clay, then record texture, pH, nutrient ratings, dates, and any amendments or crop results in your log.