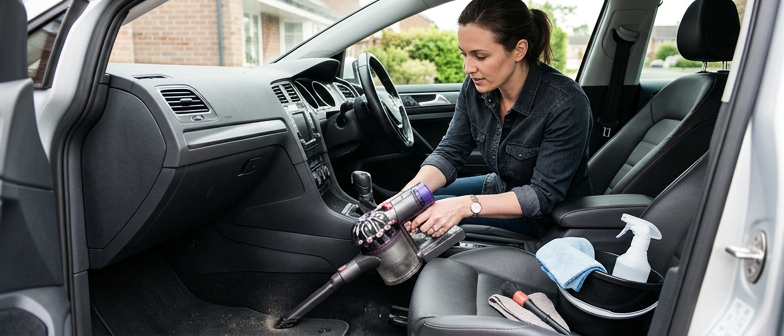
A Short Weekly Reset That Stops Buildup Early
A brief reset once a week keeps crumbs, dust and smells from turning into a full interior overhaul. Food bits, sand and moisture can work into fabrics and vents, where they trap odor and irritants. A predictable routine breaks that cycle so most drives only need light touch‑ups.
Start by clearing everything out. Toss rubbish, remove cups, snack bags, tissues and anything damp so moisture does not sit in the cabin. Take out the floor mats and give them a good shake to remove loose grit and sand before you even pick up a vacuum.
Then work from top to bottom. Use a soft brush attachment on the dashboard, console and vents, letting dust fall to the floor. Switch to crevice and upholstery tools for seat seams, under booster seats and along rails where crumbs tend to collect. Finish with carpets and mats, then put the mats back once they are vacuumed on both sides.
After vacuuming, lightly wipe high‑touch areas: steering wheel, gear selector, door pulls, screen surrounds and buttons. Stick to interior‑safe products and avoid harsh chemicals that can damage finishes or screens. For fabric seats or carpets, blot any fresh spots with a mild cleaner instead of scrubbing aggressively, which can spread stains or roughen fibers.
To handle lingering smells, a light sprinkle of baking soda on cloth seats or carpets can help. Let it sit briefly, then vacuum it up. If the air still feels stale, a fabric‑safe deodorizer and attention to the cabin air filter can support cleaner air between interior sessions.
One Simple Loop For Seats, Mats and Touchpoints
Turning interior care into a single loop makes it feel like a repeatable habit. Instead of jumping around the cabin, follow the same path every time so nothing gets missed and the job feels faster.
A practical order is: seats, floor mats, then touchpoints, moving from front to back.
Working Through Seats and Mats
Start with the seats. Slide them along their rails so you can reach edges and hidden spots. Vacuum seams, the gaps where seat backs meet cushions and the areas under child or booster seats. If the material allows, use a lightly damp cloth or suitable interior cleaner on the seat surfaces.
Once seats are handled, lift out the mats again if needed. Shake them outside and vacuum both sides. Mats catch most of the grit from shoes, so keeping them clean reduces how often you need to deep‑clean carpets.
As you move through the cabin, follow the same direction each time. Work along door sills, seat rails and the cargo lip, then up to cup holders, console seams and the backs of the front seats. This keeps you from backtracking and spreading debris onto clean areas.
Focusing On The Spots You Actually Touch
Cabins often feel messy even when they do not look visibly dirty because touchpoints carry skin oils and light grime. These include the steering area, door pulls, window switches, climate buttons and screen bezels.
Use a soft, slightly damp cloth to wipe these areas, adding a cleaner designed for interiors where needed. On textured plastics, a soft brush or applicator pad helps lift dirt from grooves. If you use a dressing product, keep the layer thin and even so surfaces look clean rather than shiny or sticky.
Over time, running the same loop after busier trips or once a week stops buildup from settling in. The goal is not perfection every time, but a steady routine that keeps everything feeling cared for.
Here is one way to think about different interior areas when planning your loop:
| Interior focus area | Typical issues you are managing | Helpful approach for routine care |
|---|---|---|
| Seats and seat rails | Crumbs, sand, fabric wear, hidden clutter | Slide seats, vacuum seams and rails, blot fresh spots gently |
| Mats and carpets | Grit from shoes, moisture, trapped odor | Shake mats, vacuum both sides, allow damp areas to dry fully |
| Touch controls | Skin oils, fingerprints, light dust | Wipe with soft cloth, use gentle cleaner, avoid harsh products |
Keeping Cabin Air Feeling Clear And Comfortable
Air quality is closely tied to how tidy the interior is, how much dust sits on surfaces and how clean the vents and filter are.
Clearing Obvious Sources And Managing Moisture
Start with a quick sweep for rubbish. Empty drink cups, food wrappers and old receipts. From there, dust the dashboard, console and door panels lightly so particles fall onto surfaces you plan to vacuum next.
Vacuum seats, mats and carpets, then use a small brush around seams, cup holders and vents to lift crumbs and dust that hide in corners. For cloth seats, a fabric‑safe cleaner can help with light marks, as long as you avoid soaking the fabric. Once you are done, opening windows for a short while helps any remaining moisture dry out instead of turning musty.
When the cabin smells off, fragrances only cover the problem temporarily. Check under seats, in door pockets and around storage bins for spills or forgotten snacks. Wipe sticky spots, especially around cup holders and organizers where liquids tend to collect. Baking soda sprinkled on carpets or cloth seats and vacuumed later can support odor control without heavy scents.
Paying Attention To Vents And Filters
Vents play a larger role in comfort than many drivers realize. Dust them with a soft brush and run the fan briefly with windows open so loosened particles can escape. If air from the vents feels weak or has a lasting stale smell, it may be time to look into the cabin air filter and whether it needs cleaning or replacement according to the vehicle’s guidance.
Building a light routine instead of waiting for rare deep cleans is easier to maintain: remove rubbish once a week, give high‑touch surfaces a fast wipe and vacuum on a regular schedule. These habits help keep dust, grime and odors from building to the point where they feel overwhelming.
Storage Habits That Keep Clutter Quiet
Smart storage in a vehicle is less about adding more containers and more about creating small, repeatable habits that prevent clutter from piling up. When each item has a clear place and there is a regular moment for things to leave the cabin, cleaning feels shorter and less stressful.
A simple idea is to pair interior resets with stops you already make. Some drivers keep a small trash container in the front and empty it whenever they refuel, along with any cups or receipts that are ready to go. This kind of built‑in trigger helps rubbish leave the car before it spreads across seats and floors.
Another helpful principle is giving each type of item a dedicated “home.” A shallow pouch for charging cables, a soft container for toys and a small organizer for documents can keep surfaces visually calm and make it obvious when something is out of place. Ideas from home organizing carry over well: when items have clear baskets or bins, they are easier to put back and less likely to drift around the cabin.
At the end of the day, a short reset can prevent clutter from turning into a bigger project later. Spending a few minutes returning items to their containers and pulling out anything that belongs in the house cuts down on the sense of mess when you next open the door.
To decide what kind of storage approach suits you, it can help to think about how the car is used most of the time:
| Main use pattern | Typical clutter risk | Storage habit that can help |
|---|---|---|
| Daily commuting | Receipts, drink cups, small snacks | Small front trash bin, scheduled empty at regular stops |
| Family trips | Toys, snacks, extra clothes | Soft bins for kids’ items, routine evening sweep for stray pieces |
| Mixed errands | Shopping bags, work items | Dedicated spot for bags, quick check before parking at home |
Q&A
-
What is a practical car cabin cleaning routine for busy drivers?
A practical routine focuses on a short, repeatable sequence: remove trash, shake out mats, do a quick top‑down vacuum, then wipe key touchpoints. Limiting the process to 10–15 minutes once a week keeps the cabin consistently tidy, controls odors and prevents dust, sand and crumbs from turning into stubborn, set‑in grime. -
What are some effective dashboard care tips that protect materials?
For dashboards, use a soft microfiber cloth and a water‑based interior cleaner, avoiding silicone‑heavy, glossy dressings that can cause glare or attract dust. Work gently around seams and buttons, never spray directly on screens, and finish with a non‑greasy UV‑protectant to reduce fading, cracking and sticky buildup over time. -
How can I improve interior dust control without constant deep cleaning?
Interior dust control relies on smart habits: keep windows closed on dusty roads, use the cabin filter on recirculate briefly in heavy traffic, and wipe flat surfaces weekly with a damp microfiber instead of dry paper towels. Storing loose items in closed bins also limits surfaces where dust can settle and be stirred up. -
What are the seat maintenance basics for fabric and leather interiors?
For fabric, vacuum seams often and spot‑treat spills quickly with a mild cleaner to prevent wicking stains. For leather, wipe with a slightly damp cloth, then apply a dedicated conditioner a few times a year. Avoid harsh detergents, scrubbing brushes and excessive water, which can cause discoloration, stiffness or mildew. -
How do I build a weekly vehicle cleanup plan that includes storage and fresh air vent cleaning?
Design a simple checklist: empty trash, return items to organizers, shake mats, quick vacuum, wipe touchpoints, then brush and wipe vents while the fan runs briefly. Finish by cracking windows or running the fan on fresh‑air mode. Keeping labeled storage bins ensures everything has a home, so the weekly plan stays effortless.